How to implement Geo load balancing with Routify
Learn how to implement geo load balancing with Routify.
Hakan Shehu
April 20, 2024

Geo load balancing, also known as global server load balancing (GSLB), is the practice of distributing incoming network traffic across multiple servers spread across various geographical locations. This approach ensures that users are directed to the server closest to their physical location, reducing latency and improving load times. By utilizing a network of geographically dispersed servers, geo load balancing helps maintain high availability and performance of applications and websites.
Benefits of Geo Load Balancing
-
Improved Performance and Reduced Latency: Geo load balancing directs user requests to the nearest server, minimizing the distance data must travel. This reduces latency and load times, providing users with a faster and smoother experience.
-
Enhanced Availability and Reliability: By distributing traffic across multiple servers, geo load balancing ensures that no single server becomes a point of failure. If one server goes down, traffic is automatically rerouted to other available servers, maintaining the availability and reliability of the application or website.
-
Scalability: Geo load balancing supports seamless scalability. As traffic increases, additional servers can be added in different regions to handle the load, ensuring consistent performance even during peak times.
-
Cost Efficiency: By optimizing server utilization and reducing the need for excessive server capacity in a single location, geo load balancing can lead to cost savings. It allows organizations to use their resources more efficiently and only scale up when necessary.
-
Enhanced Security: Geo load balancing can improve security by distributing traffic and reducing the impact of potential DDoS (Distributed Denial of Service) attacks. It makes it harder for attackers to target a single server or location.
-
Localized Content Delivery: For businesses serving a global audience, geo load balancing enables localized content delivery. Users can access region-specific content, improving user experience and engagement.
Implementing Geo Load Balancing with Routify
Routify provides a simple and efficient way to implement geo load balancing for your applications and websites. By leveraging Routify's global network of servers, you can easily distribute traffic across multiple locations and ensure optimal performance for your users worldwide.
Here's how you can implement geo load balancing with Routify:
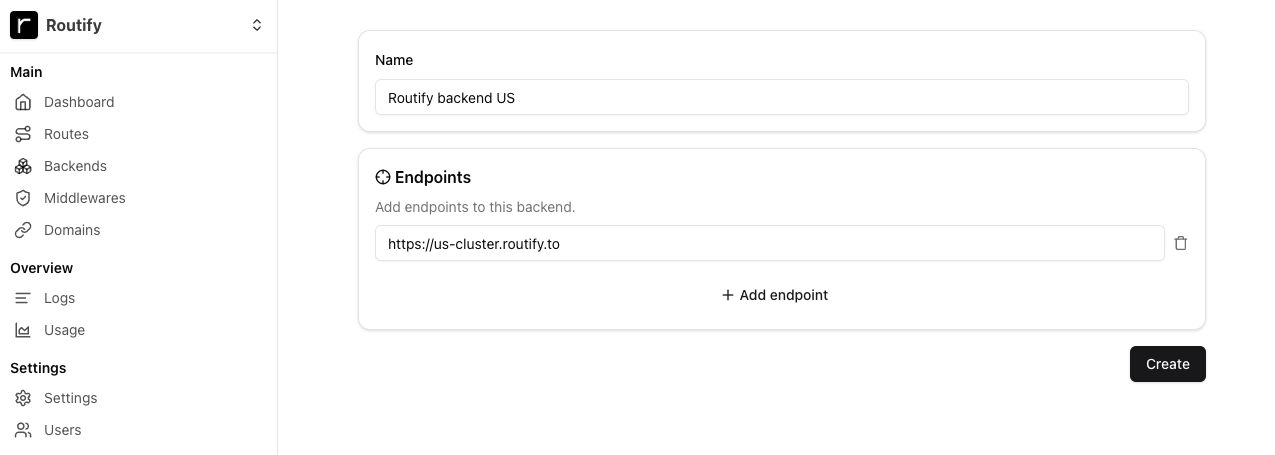
Create backend services in multiple regions
Start by creating different backends in Routify for your application or website. Each backend should correspond to a server or cluster located in a specific region. For example, let's create a backend for our EU cluster and another for our US cluster. In this example we are going to use two domains as endpoints for the backends, but you can use even IP addresses.

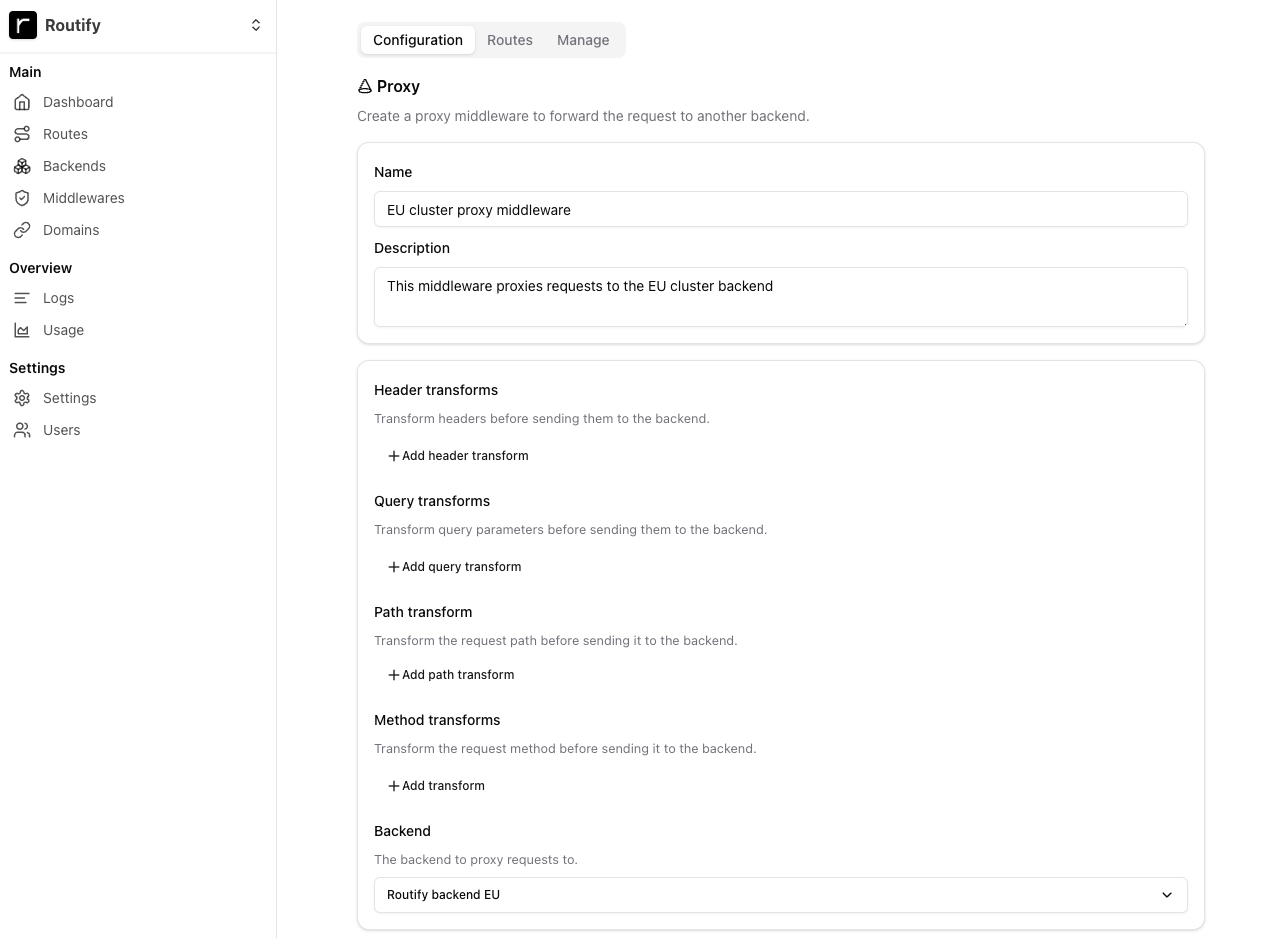
Create proxy middlewares
Now create corresponding proxy middlewares in Routify that will route traffic to the backends we created earlier. As you can see here we are simply proxying the original requests to the specific backends. You can also perform request transformations on the fly, before sending the request to the backend, for example including additional headers or modifying the path or query parameters. You can also include dynamic variables such as geo metadata, route or app id etc. Learn more about Routify's proxy middleware.

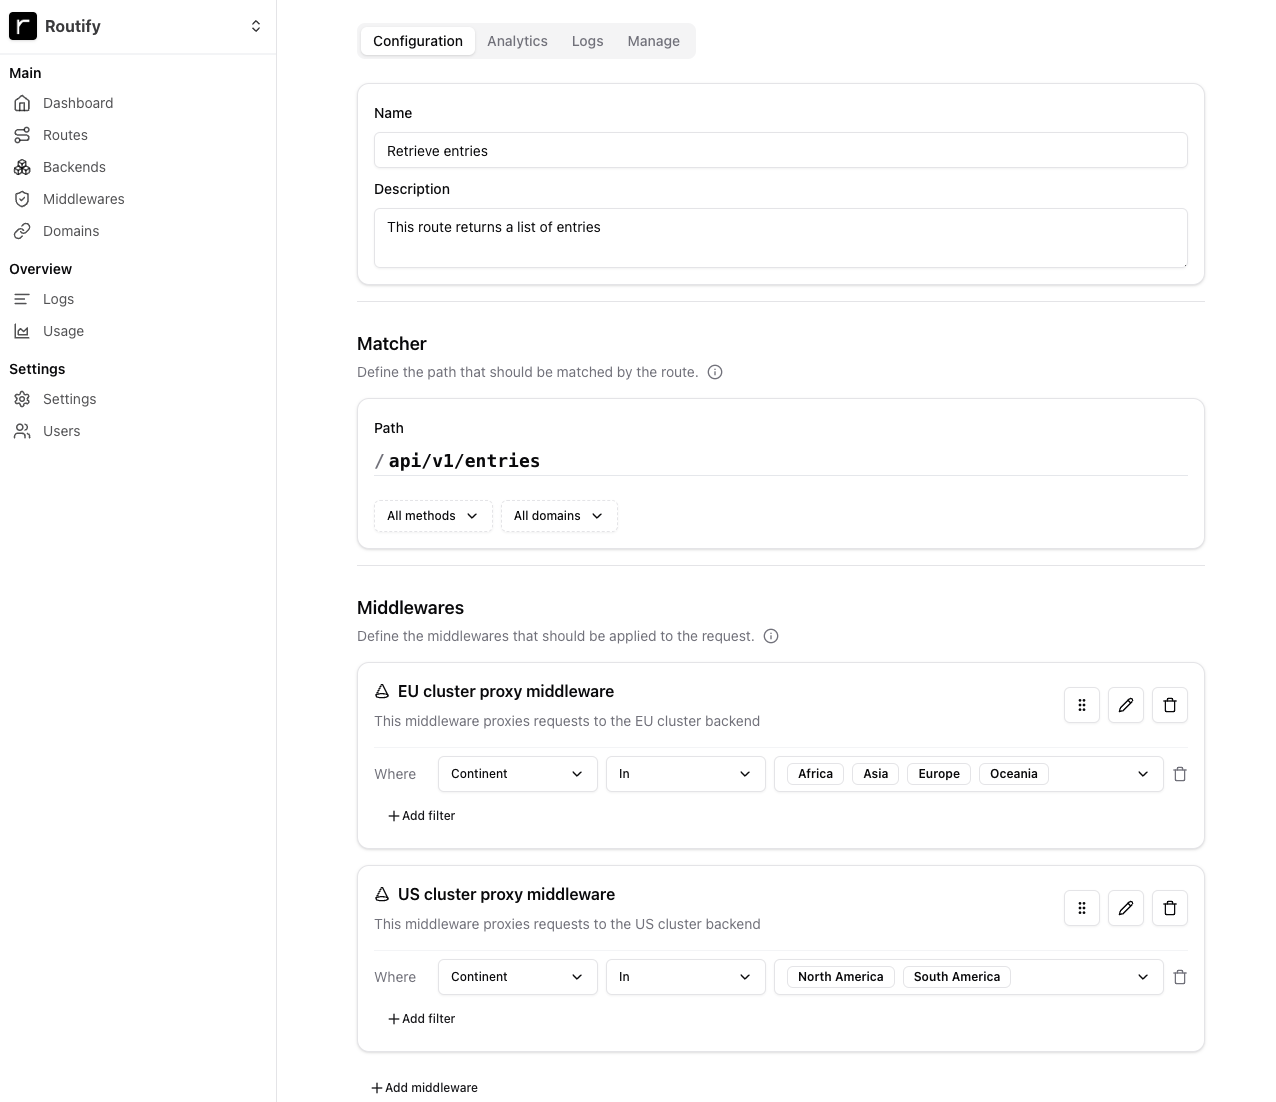
Apply middleware to the route
Finally, apply the proxy middleware to the route in Routify where you want to implement geo load balancing. You can apply multiple middlewares in the same route with custom orderin. To apply geo load balancing we are going to use request filtering feature for route middlewares, to specify when a specific middleware should be applied. In this example, we are going to create a route api/v1/entries and apply both EU and US middlewares to it.
On the EU middleware we are going to specify that it should be applied when the request comes from Europe, Asia, Africa or Australia, and on the US middleware we are going to specify that it should be applied when the request comes from the Americas.
How it Works
When you (or your users) make a request to one of your domains connected to Routify, the request is routed to the closest edge proxy using anycast network. The edge proxy then checks the request against the routing rules you have configured and routes the request to the appropriate backend based on the specified conditions. This ensures that users are directed to the nearest server, optimizing performance and reducing latency.